Photography is an indispensable tool for the study of macrofungi. Photographers should document as much information as possible about a fungus, especially to aid identification.
The observer should consider photographing:
1) all sides of the fungus 2) with scale for measurement 3) external details (i.e. close-ups) 4) the base (e.g. mycelium, buried or hidden parts) 5) the interior (typically sectioned with a knife) 6) spore deposits 7) color changes 8) exudate 9) different stages of growth 10) numerous individuals to show morphological variability 11) in different seasons 12) its substrate or habitat
Some things cannot be easily photographed, and such things ought to be carefully noted, including firmness/brittleness, texture (e.g. slimy, dry, scabrous), smell, taste (only with proper expertise and caution), population aspects (solitary, numerous, etc.), colors which may not be accurately depicted by photography, habitat, and associated organisms (e.g. mycorrhizal plant host, plant identification of dead wood).
For whatever camera you choose, accessories worth using include a tripod, macrolens for close-ups, portable light for shaded conditions, and an umbrella for diffuse lighting in sunny conditions.
All photos by the author except where noted.
All sides (top and bottom)
Having views of both sides of these fungi allows them to be more easily identified. A. Gloeophyllum sepiarium, with a zonate pileus with lamellae below. B. Hexagonia papyracea, with a zonate pileus with tubes below.
With scale (e.g. coins, ruler, etc.)
A. Geodina guanacastensis, with a quarter for scale. B. Myxarium nucleatum, with a dime for scale.
External details – lamellae & stipe attachment
A. Pluteus sp., the pinkish, crowded lamellae free from the stipe. B. Heliomyces decolorans, the distant, sinuous lamellae with low, transverse ridges, the lamellae attached to the stipe.
External details – lamellae edges
A. Amanita cf. fuscostriata, with denticulate lamellae edges and a finely farinose stipe. B. Entoloma sp., with irregularly sinuate lamellae edges and a striate stipe.
External details – stipe texture (avoid touching)
A. Boletus luridellus, stipe with evident reticulation, in outdoor lighting. B. Boletus luridellus (same collection as A), stipe reticulation obscured by handling and touching, in indoor lighting.
External details – veil remnants (avoid touching)
A. Gymnopilus sp., with an annulus and the fibrillose pileus with an appendiculate margin, remnants of the partial veil. B. Fistulinella jamaicensis, with a viscid, mucilaginous veil covering the pileus (as well as covering most of the stipe).
External details – hairs
A. Neoboletus antillanus, with a pubescent-villous stipe base. B. Favolus brasiliensis, the pileus with a hirsute margin.
Base – basal mycelium
A. Panus velutinus, with purplish, tomentose basal mycelium that is white on the periphery. B. Marasmius sp., with beige, filamentous basal mycelium at the stipe base.
Base – hidden parts
A. Tremella fuciformis, with a yellow-orange base evident only upon removal of the entire sporocarp. B. Amanita cf. bisporigera, with the saccate volva buried in sand and leaf litter, and a partial veil covering most of the lamellae.
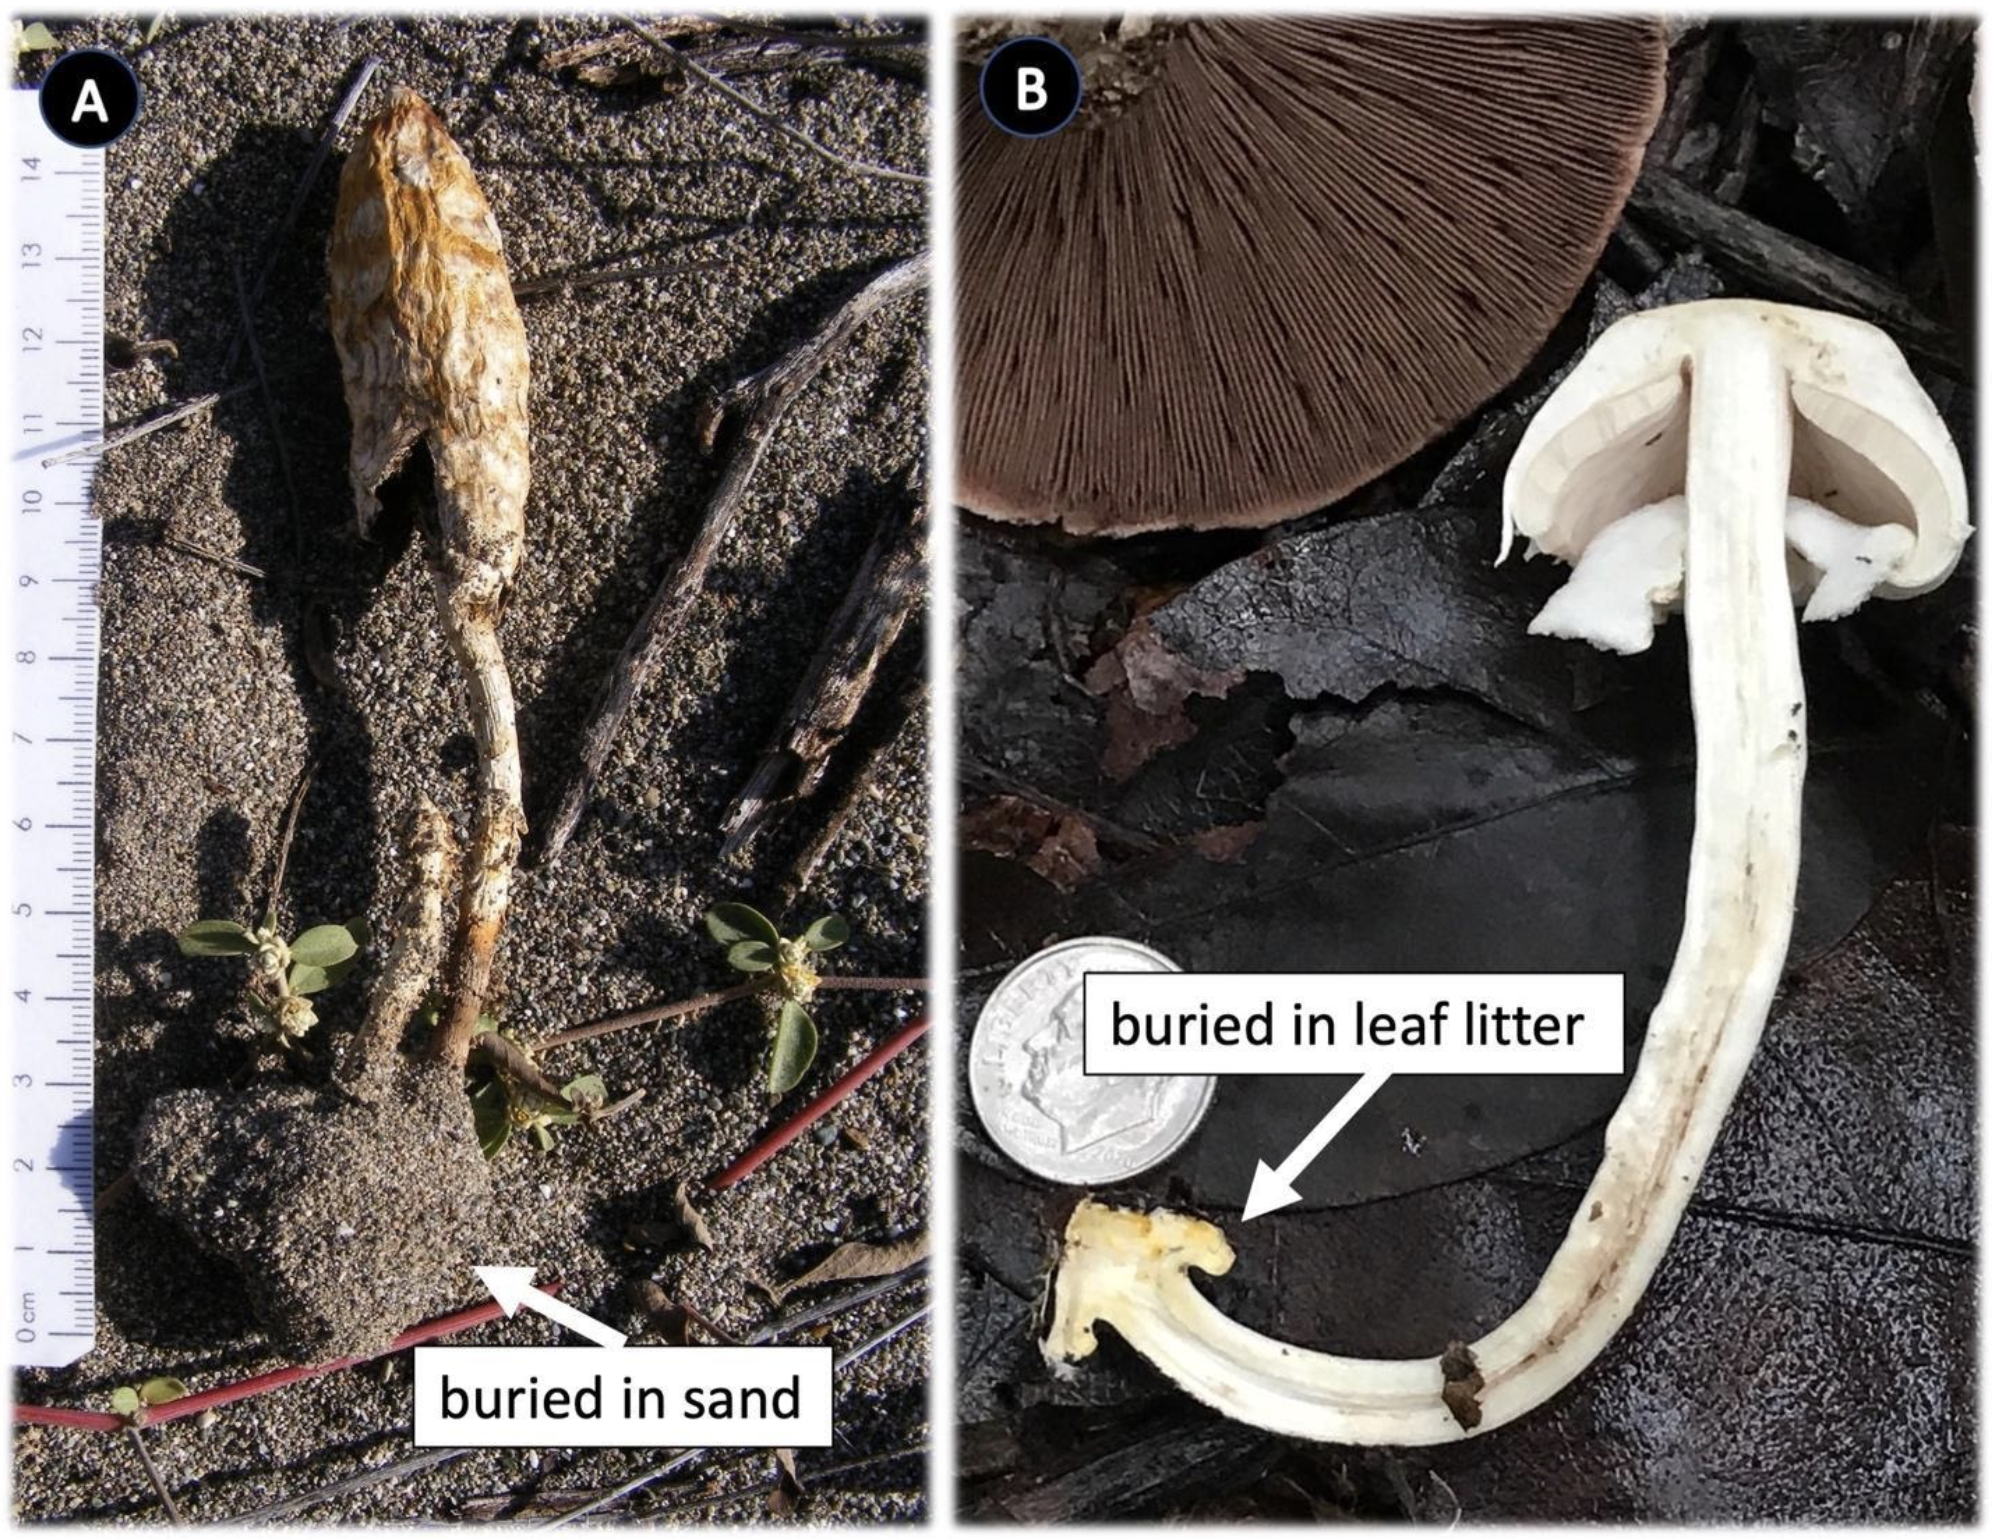
Base – hidden parts
A. Podaxis sp. with tuberous base excavated from sand in dunes. B. Agaricus with bulbous base buried in leaf litter, turning light yellowish when sectioned, immature fungus; mature fungus in upper left with chocolate brown gills.
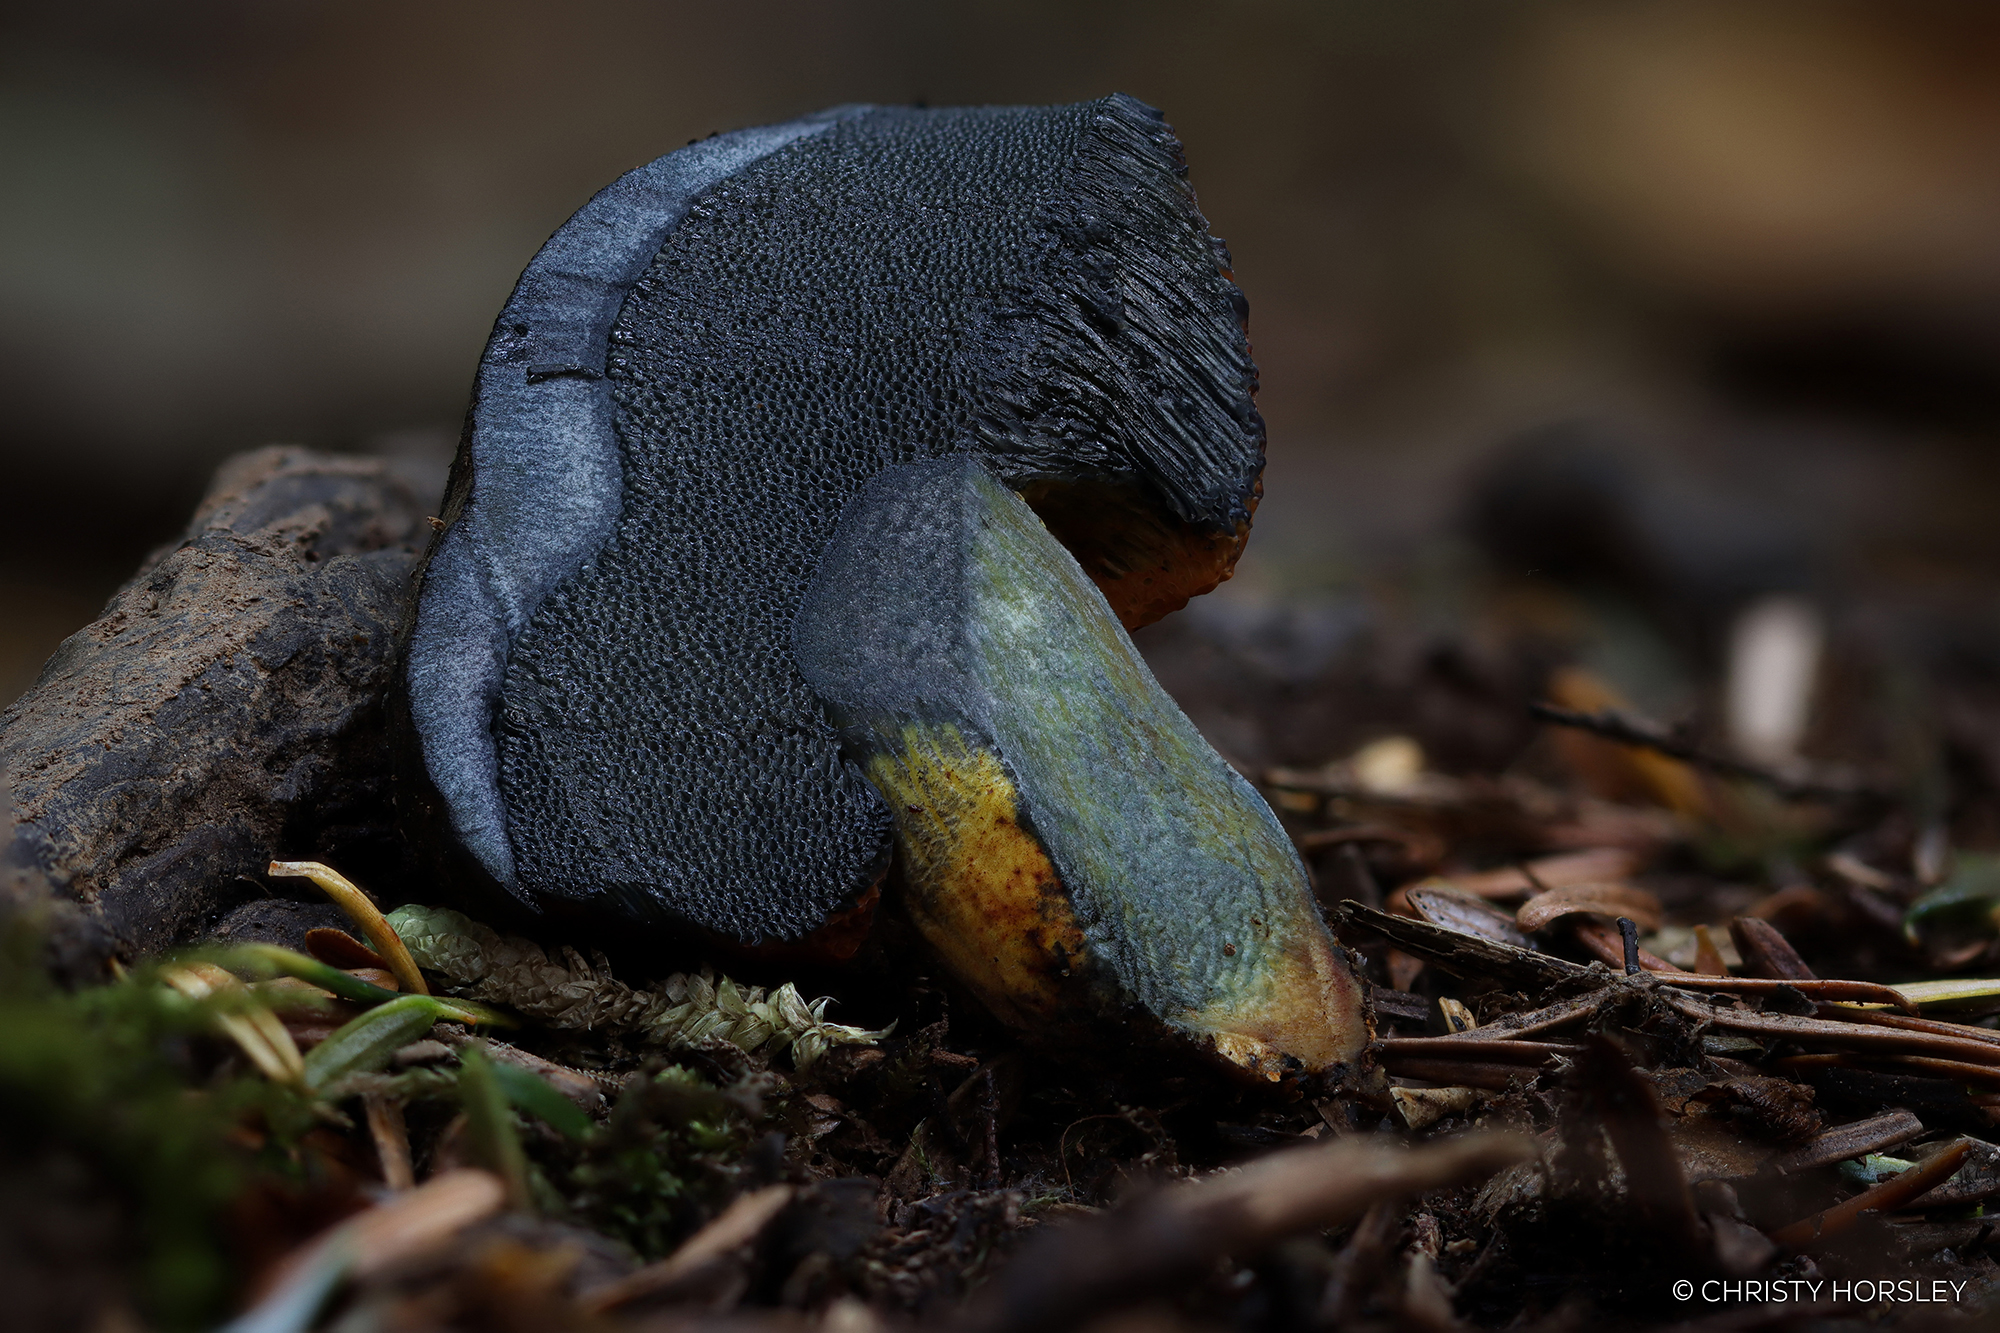
Interior
A. Scleroderma sp., with a dark brown to nearly black interior spore mass. B. Neoboletus antillanus, with a light yellow interior (context) that is bluing.
Interior
A. Tremelloscypha gelatinosa, with a zonate interior. B. Lactarius psammicola, with a hollow stipe, verrucose on the interior.
Spore deposits – at home
A. Boletus atkinsonii, a dark olive spore print. B. Volvariella bombycina, a pink-brown spore print.
Spore deposits – in the field
A. Fulvifomes sp., with an orange-brown spore deposit on cobwebs. B. Pluteus sp., the middle pileus with a pink-brown spore print deposited from an adjacent, overtopping pileus.
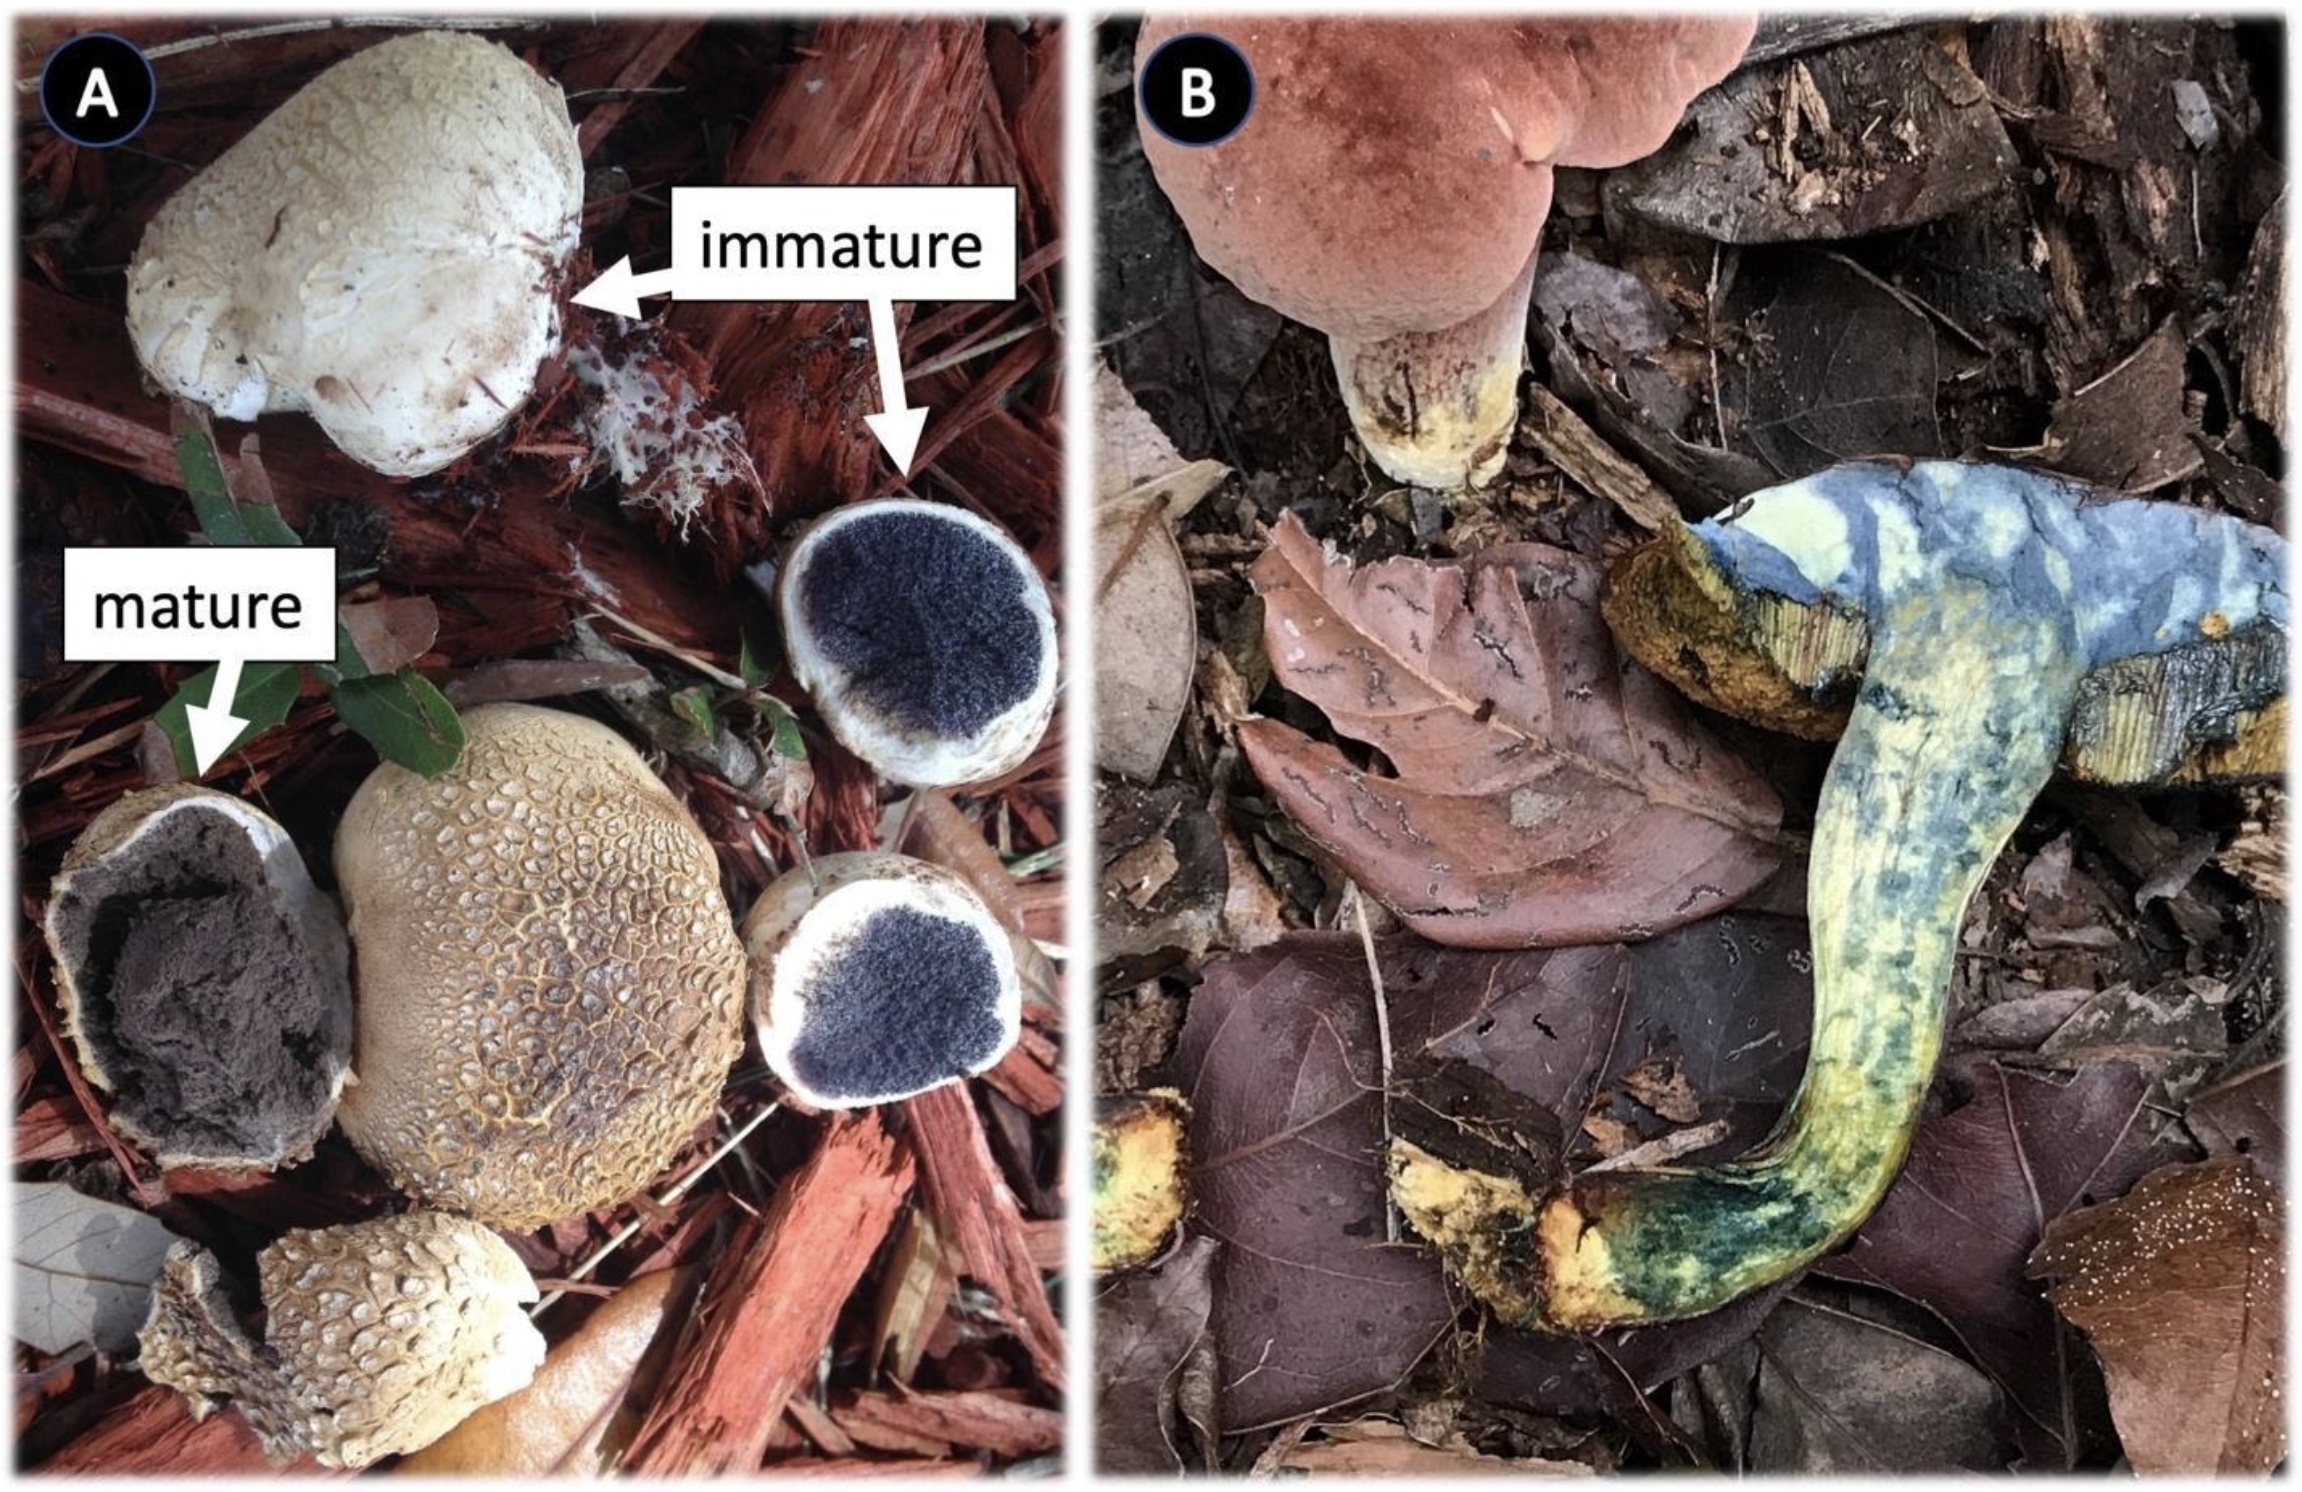
Color changes – instant
A. Abundisporus fuscopurpureus, the white pore surface turning purplish after being rubbed. B. Neoboletus antillanus, the yellow tube surface turning dark blue after being lightly rubbed.
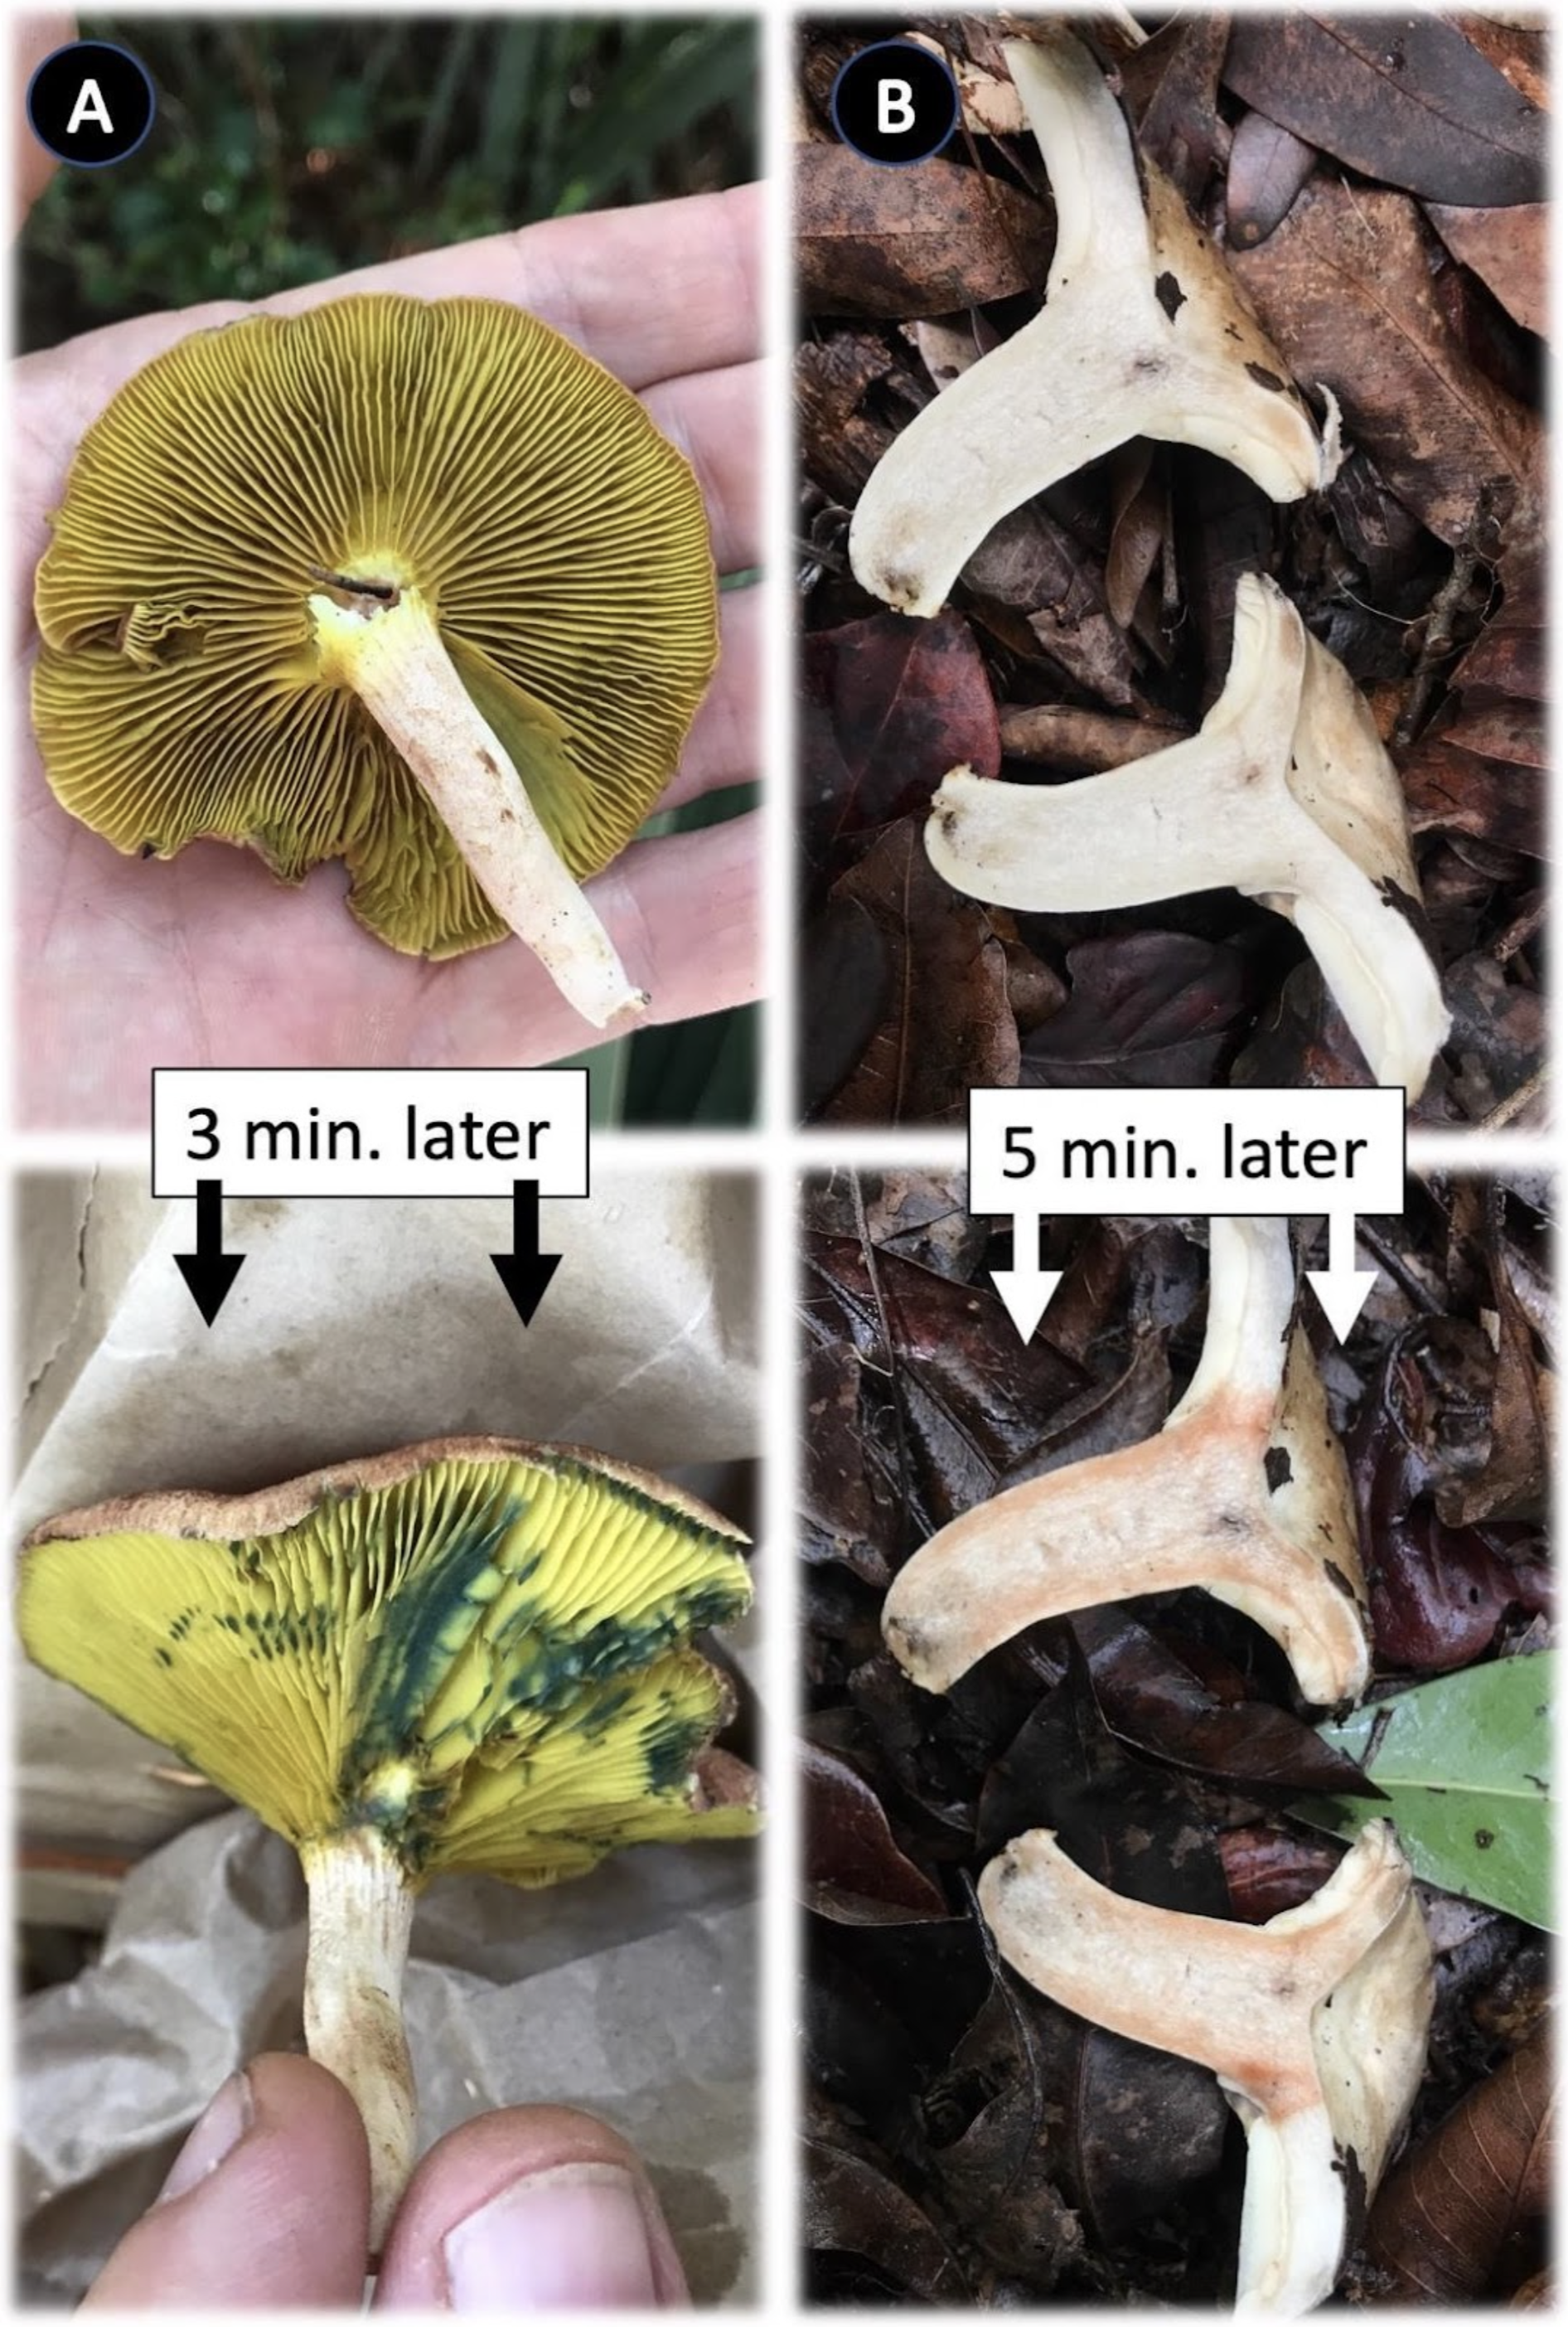
Color changes – delayed
Some color changes are not immediate but develop over time, such as a few minutes to 60 or more minutes (e.g. some species of Lactarius). A. Phylloporus foliiporus, bruising blue 3 minutes after handling the fungus. B. Russula subdensifolia, the internal tissue (context) turning brownish pink after cutting and waiting 5 minutes.
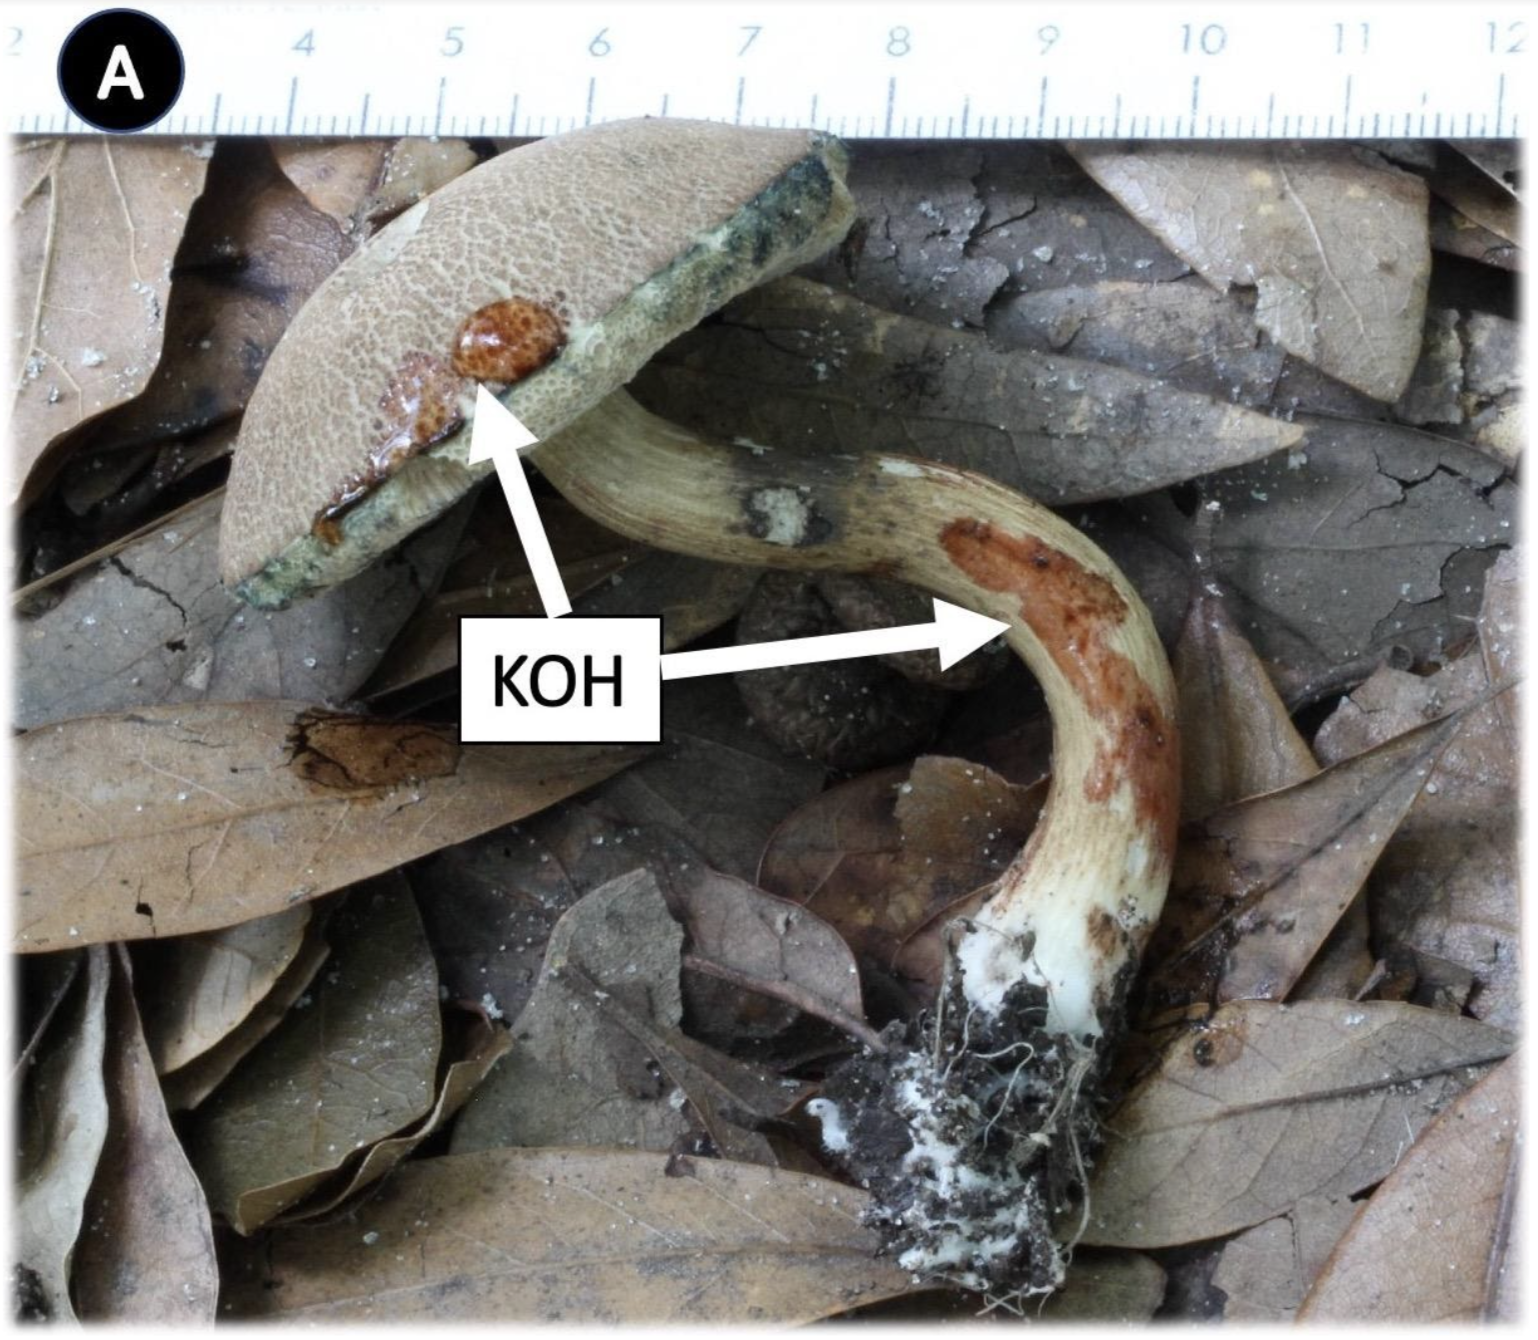
Color changes – chemical reactions
A. Tylopilus porphyrosporus with a brown-red reaction to potassium hydroxide (KOH); photo by Arian Farid.
Exudate
A. Lactarius yazooensis, pale yellow latex exuded from lamellae after cutting. The latex in some species of Lactarius may change color over time, which should also be documented. B. Butyribolteus floridanus, yellow-orange droplets exuded from tubes.
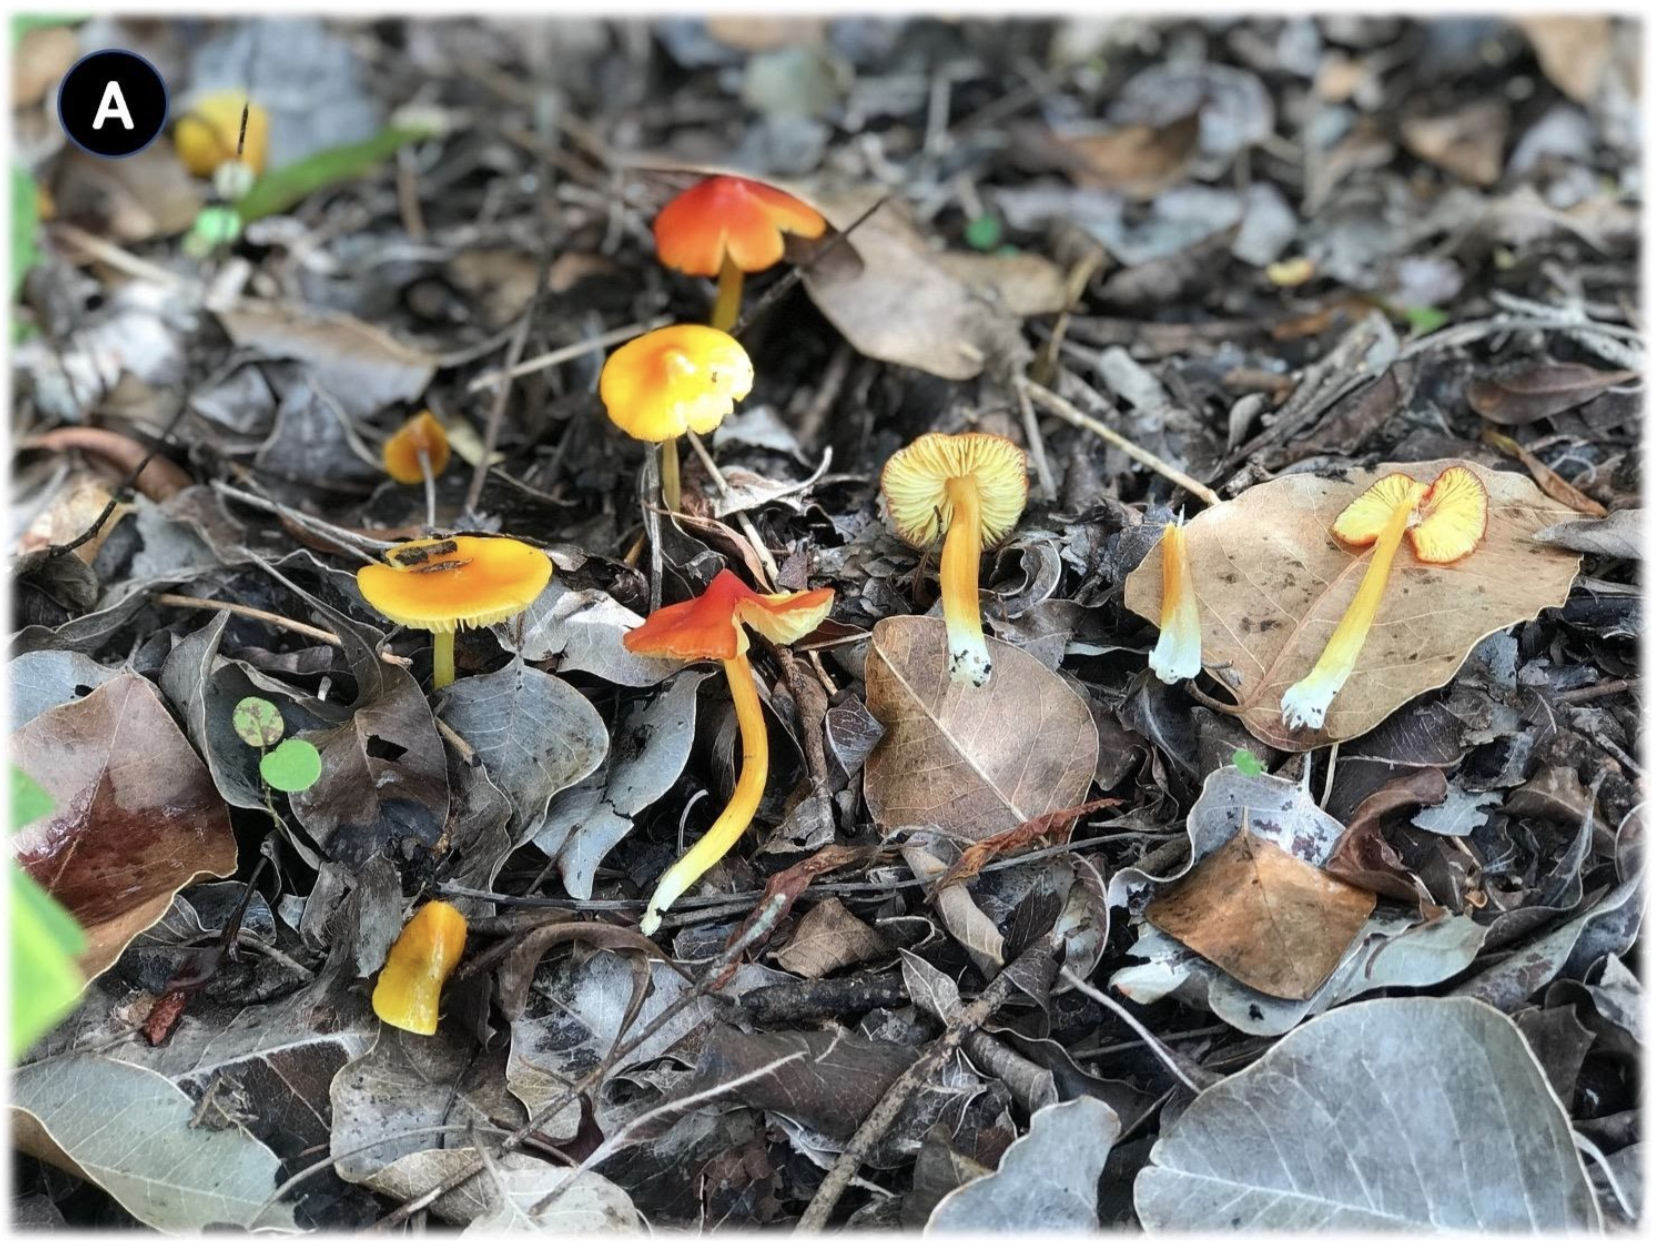
Numerous individuals
A. Hygrocybe sp., numerous individuals presumably of the same species showing variability in color.
Different stages – young to old
A. Volvopluteus sp., with very young button stages, immature stage with campanulate pileus, and mature stage with fully expanded pileus (the one on the right with a pinkish spore print atop the pileus from an adjacent mushroom). B. Lycoperdon marginatum, with a very young pellet-like stage, immature stage with stronger echinate scales, mature stage with the outer peridium flaking away, and post-mature stage lacking most of the peridium.
Different stages – single sporocarp nurtured at home
A. Immature sporocarp of Panus velutinus, on its woody substrate as found in the forest (in situ). B. The very same sporocarp of P. velutinus two days later, now mature, nurtured at home on its woody substrate by keeping it moist (ex situ). This can be done for many other immature fungi with a complete sporocarp intact, by keeping them moist (e.g. in a cup with a wet tissue at the base).
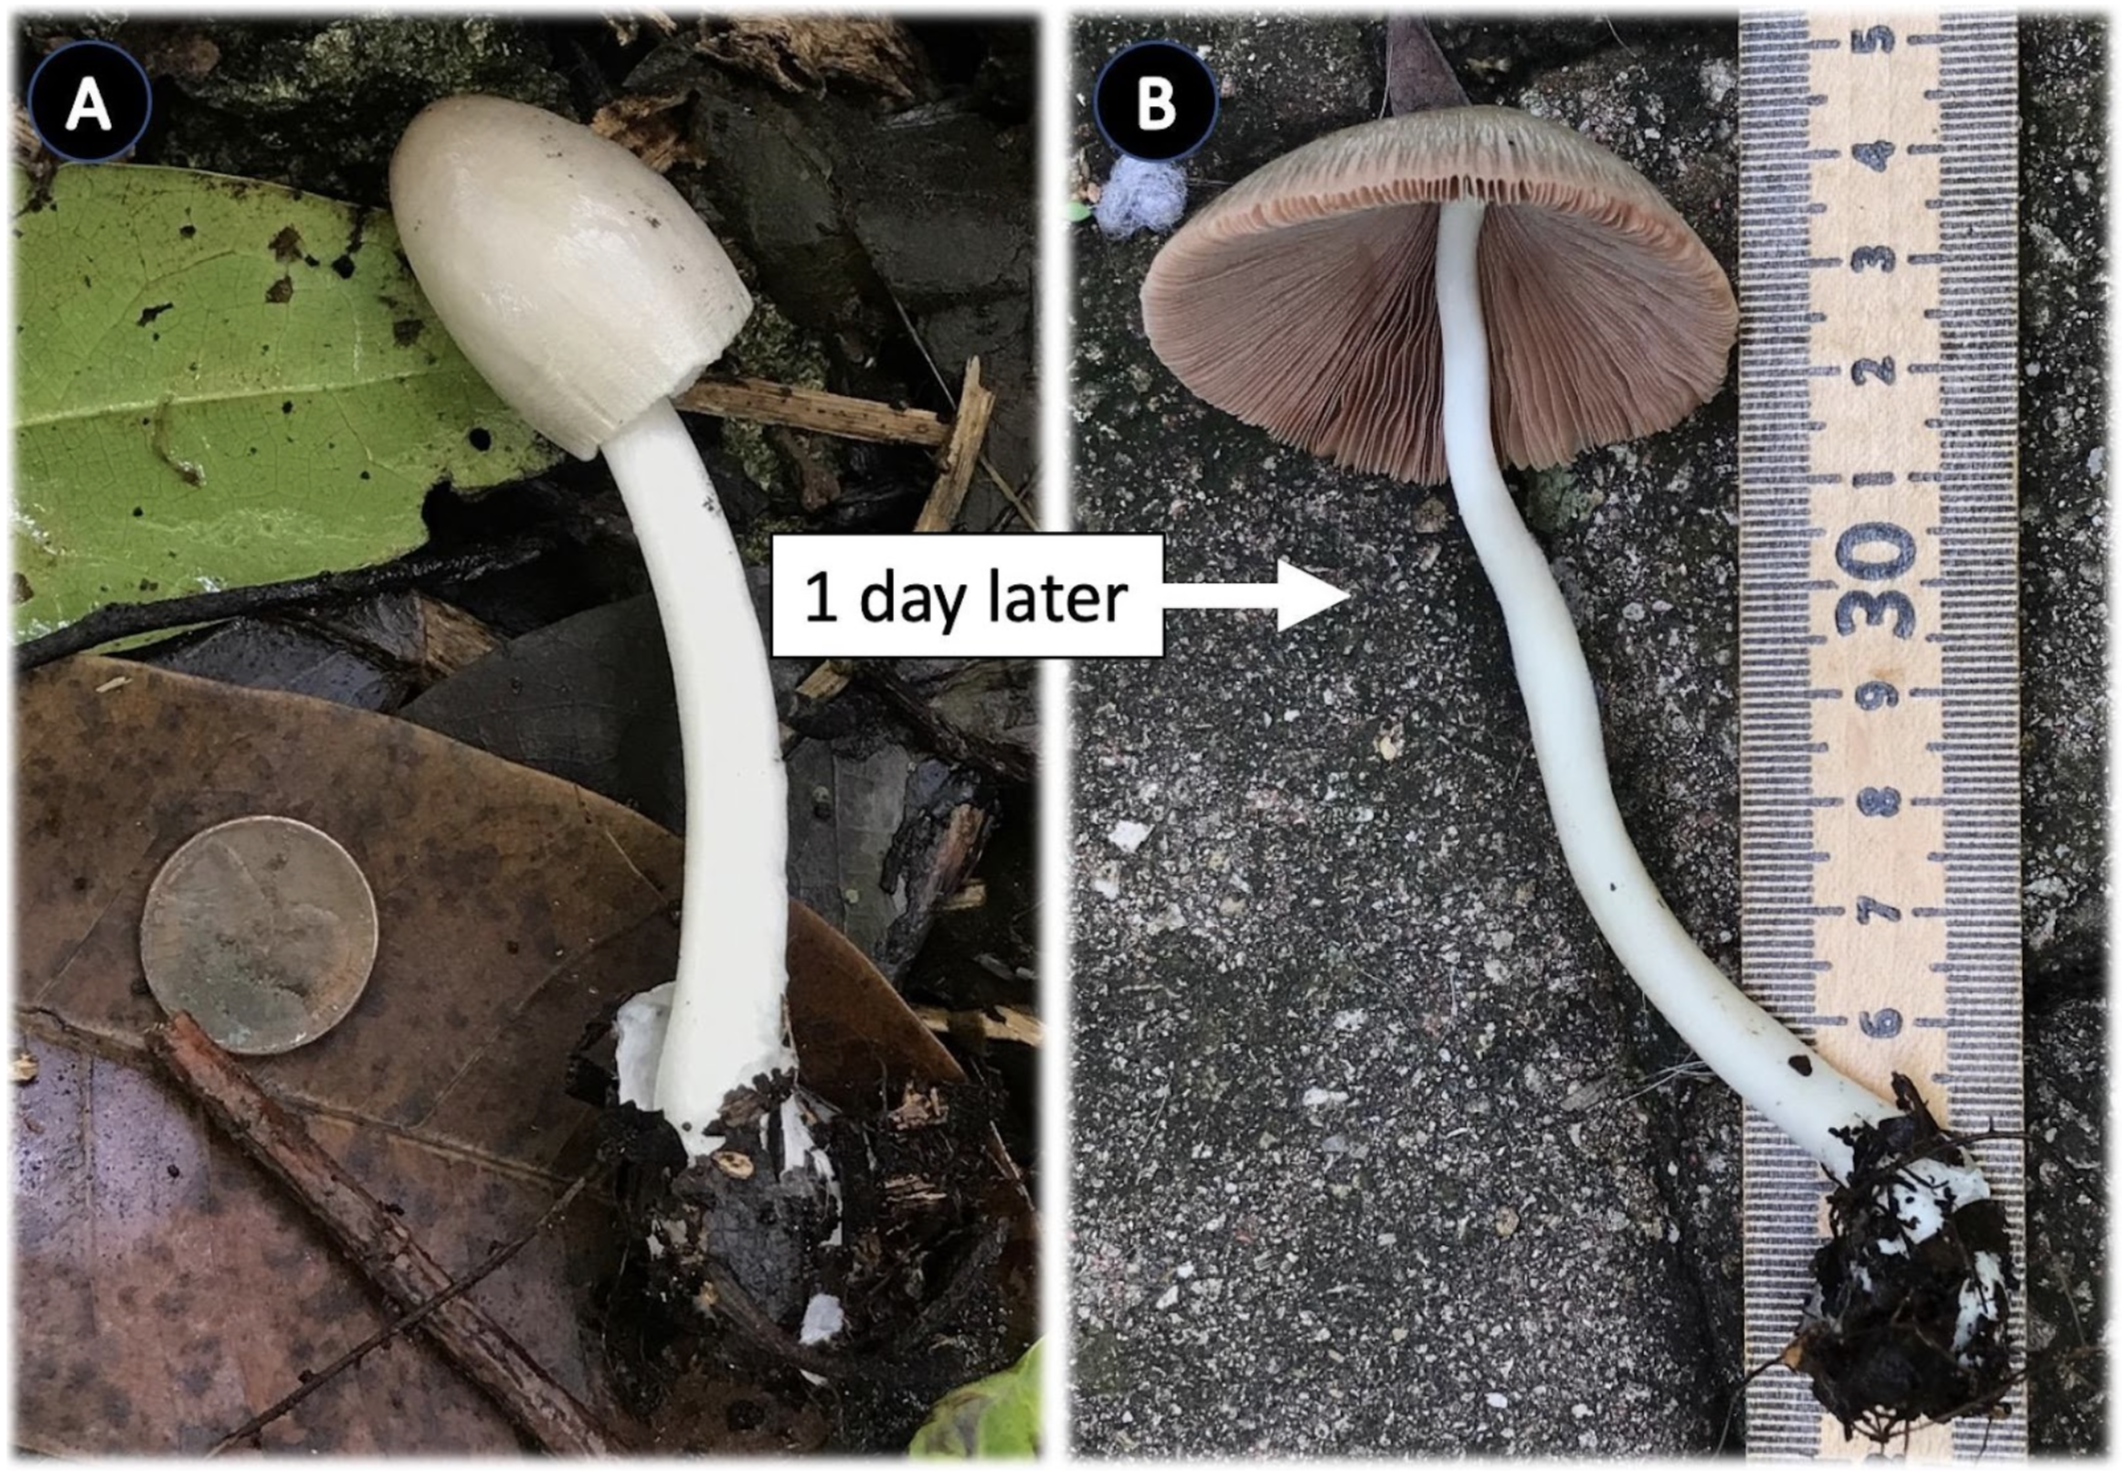
Different stages – single sporocarp nurtured at home
A. Immature sporocarp of Volvopluteus sp., with intact stipe base and volva (in situ). B. The very same sporocarp of Volvopluteus one day later, now mature, nurtured at home by placing in covered cup with the stipe base and volva enveloped in moist paper towel for 1 day to expand cap (ex situ).
Different seasons
A. A species of Polyporales in early fall (0.15 cm rainfall in prior 6 days). B. The same species of Polyporales (from the same exact colony as A) in the late summer (8.66 cm rainfall in prior 6 days).
Substrate and habitat
A. Volvariella bombycina, among dead wood in wound of living tree. B. Cypress swamp and the host tree (Pinus elliottii) ectomycorrhizal with Suillus decipiens.
Author: Alan Franck
Collection manager for the University of Florida herbarium (FLAS). My primary interests revolve around botany and mycology, including biodiversity, human history, natural history collections, taxonomy, phylogenetics, horticulture, ecology, and medicine.
Deep Funga Blog is for longer articles than fit in the bimonthly eNewsletter. We seek postings that are helpful and/or interesting to the FunDiS community. Share your feedback in comments below each article (sign in first) or on the blog post on FunDiS's Facebook Discussion Group.
Got A Story to Tell?
Contribute to the Deep Funga Blog! Contact blog@fundis.org. Click herefor instructions to authors.
About Fungal Diversity Survey
FunDiS is dedicated to a world in which the fungal kingdom is fully documented, understood, appreciated and protected.
Fungal Diversity Survey 10385 Green Meadow Rd Sebastopol, CA 95472